SHOP BLACK FRIDAY SALE NOW CLICK HERE

(09) 870 3320 Schedule A Call
Call now Schedule a call

Dehydrating 101 · Vegetables

Dehydrated Vegetables: How to Blanch, Dry & Store Every Veg

Greens, root veg, cruciferous and more — for rehydrating into meals, snacking as chips or grinding into powders. Blanch where needed, dry at around 55 °C, condition, then store airtight.

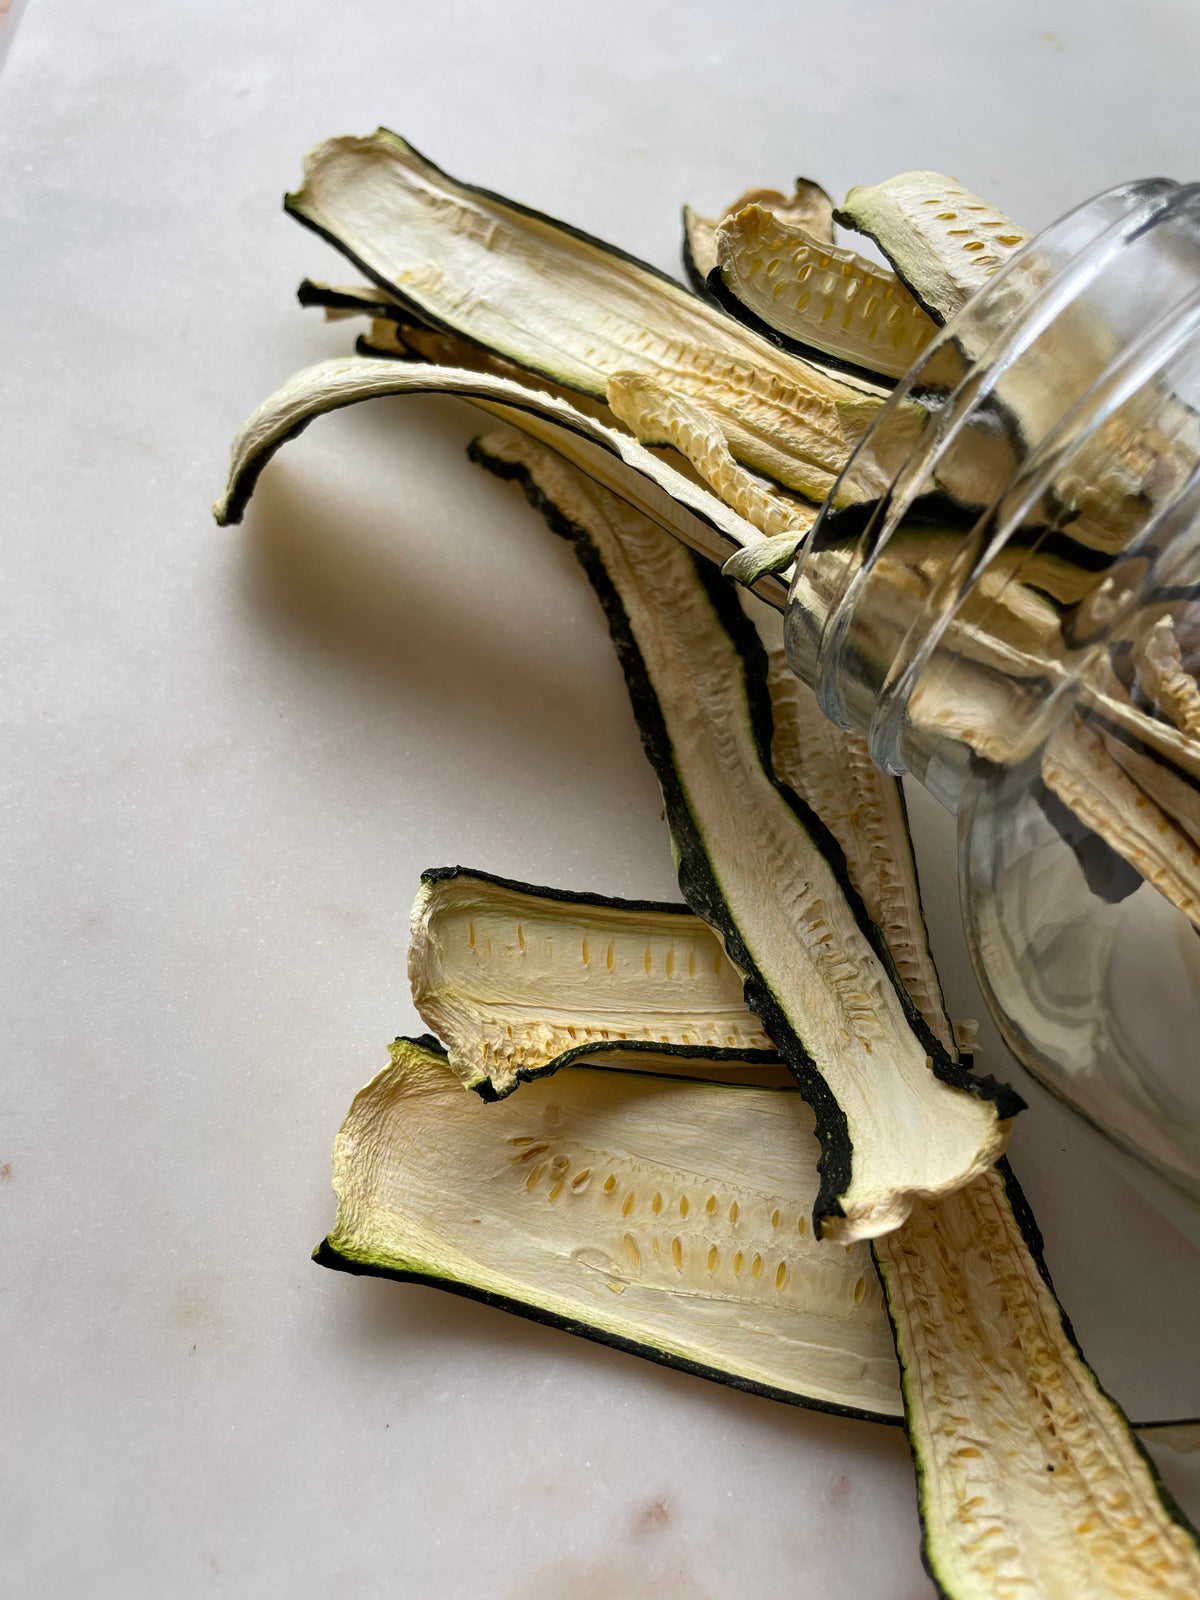
Dehydrated courgette slices before grinding into powder

≈ 55 °C

Most vegetables

One temperature for nearly every veg

4–12 h

Typical drying time

Spinach fastest; beetroot, onion & corn longest

0–7 min

Blanching

Optional for greens; up to 7 min for kūmara

5 days

Conditioning

Shake daily before long-term storage

Why dehydrate vegetables?

In Aotearoa New Zealand, dried vegetables are mostly made for the pantry and the pot, ready to rehydrate into cooking — but they also make healthy snacks, crunchy toppings and versatile powders.

Reduce food waste

Instead of throwing away vegetables close to passing their prime, dehydrate them and rehydrate when needed for soups, stews, and rice or pasta dishes.

Save money

Buy in bulk from markets, farms or supermarkets when vegetables are in season or on offer, and dry them for a ready supply later.

Healthier snacks

Kūmara chips, beetroot slices, courgette chips, kale chips and broccoli bites — cheaper and healthier than many pre-packaged alternatives.

Concentrated nutrients

Drying keeps most of the minerals and fibre and concentrates them by weight; heat-sensitive vitamin C is largely lost in blanching and drying.

Longer shelf life

Properly dried, conditioned and stored vegetables last far longer than fresh — making meal preparation more convenient.

Powders & seasonings

Grind dried veg into greens powders, onion powder or mushroom seasoning. See our Dehydrated Powders page.

Read the full introduction →

Unlike dehydrated fruit, dehydrated vegetables in New Zealand are mainly used for preserving and later rehydrating in cooking, although they can also be enjoyed as healthy snacks, added as flavourful toppings to salads and dishes, or even ground into versatile vegetable powders (see our page on Dehydrated Powders). Much like fruit, dehydrating vegetables helps reduce food waste, saves money, and allows you to get the most value out of fresh produce.

Buying vegetables in bulk from farmers’ markets, roadside stalls or supermarkets when they are in season or on offer and then dehydrating them ensures you have a supply ready to use later. Instead of throwing away vegetables that are close to passing their prime, dehydrate them and rehydrate when needed for meals such as soups, stews, and rice or pasta dishes.

For those who prefer healthy, on-the-go snacks, dehydrated vegetables are a great option. Think of kūmara (sweet potato) chips, beetroot slices, courgette (zucchini) chips, kale chips, or even crunchy broccoli bites — all cheaper and healthier than many pre-packaged supermarket alternatives.

Although nothing beats fresh vegetables in the diet, dehydrating them keeps most of their minerals and fibre, concentrated by weight once the water is removed, although heat-sensitive vitamin C is largely lost in blanching and drying [1]. The shelf life of the product is also significantly extended.

Whilst the uses for dehydrated vegetables may not be as varied as dehydrated fruits, there is still a wide variety of vegetables suitable for dehydration. They deliver delicious results and numerous health benefits, while also making meal preparation more convenient for Kiwi households.

Dehydrated greens

Packed with nutrients and quick to dry. Greens dry well without blanching for soups and cooked dishes; for chips, toppings or powders you’ll eat uncooked, blanch them for 1–2 minutes first (see food safety).

At a glance

  • Prep: Wash well; remove excess water
  • Blanching: Optional; 1–2 min if eaten uncooked
  • Temperature: ≈ 55 °C
  • Done when: Crumbles in your hands
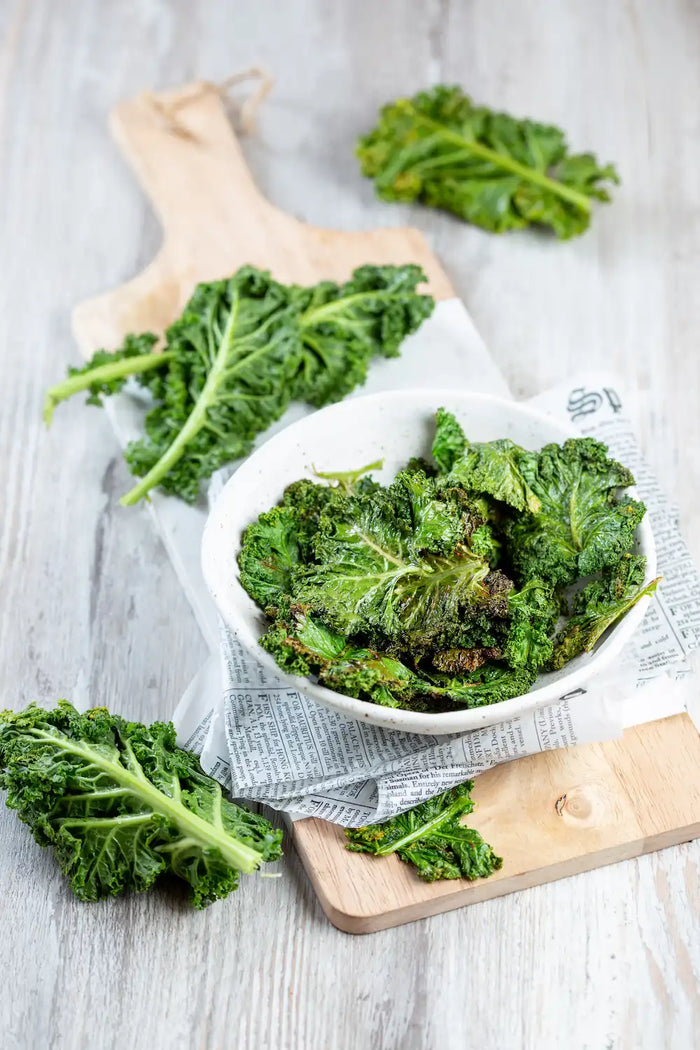
Dehydrated kale

Kale

One of the easiest vegetables to dry: wash, de-stem and load. Blanch briefly if you’ll eat it uncooked.

Blanch
Optional
Drying
6–8 h
Temp
55 °C
Rich in
Vitamins A, C, K · calcium · potassium · magnesium
Ways to use & full guide →

Ways to use

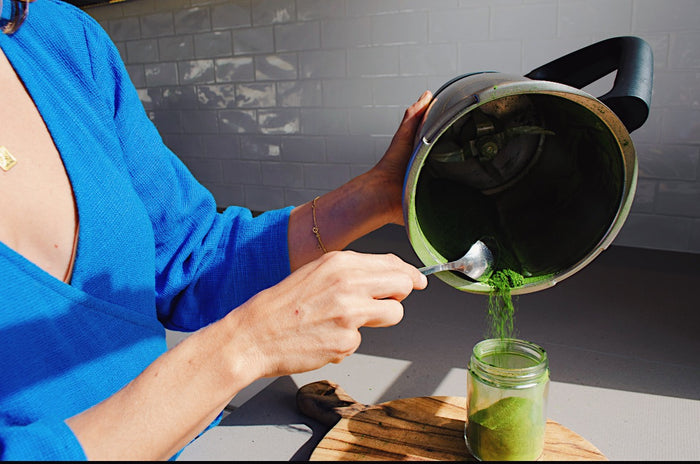
  • Grind into a powder and add to soups, stews and various hot dishes.
  • Create your own greens powder with other ground leafy greens.
  • Add dehydrated kale chips to olive oil pasta dishes, salads, fish dishes and egg breakfasts.
  • Season your at-home kale chips with anything from paprika, chilli flakes, garlic powder, sea salt or parmesan and lemon.

Tip: Done when the leaves crumble. Dry the tough middle stems separately — they take longer.

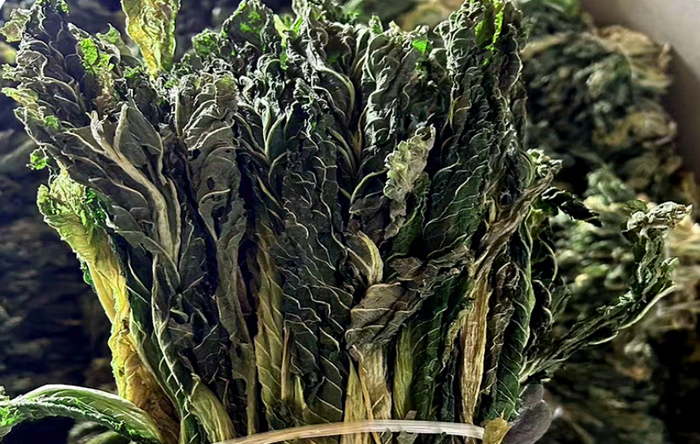
Kale is one of the easiest vegetables to dehydrate and doesn’t need to be blanched prior to the dehydration process. Dehydrating kale raw will help retain the nutritional benefits and save you a lot of time and unnecessary mess in the kitchen. It’s best to dehydrate kale when it’s in its prime, and the deeper the colour, the better. To prepare for dehydration, wash the leaves well and then remove the middle stem from the leaf — this will take longer to dry, so it should be done separately if you wish to dehydrate it also, and most commonly, it can be ground into a powder to add flavour to hot soups/stews etc.

Considered a superfood, being that it’s packed with vitamins, minerals and antioxidants including vitamins A, C, K, calcium, potassium, niacin and magnesium — you’ll find dried kale in many greens powders available in health food stores. Adding just a spoonful of greens powder to various smoothies and dishes will allow you to gain a multitude of nutritional benefits, and this is much easier than eating a plateful of raw kale to get the same results. Some of the health benefits of dehydrated kale include boosting immunity, supporting weight loss goals, improving bone strength and density and promoting heart health.

You can also find kale chips in many New Zealand supermarkets and health food stores, but making your own batch at home can save money. Plus, you can get creative with seasonings and flavourings to suit your taste. See our suggestions below on how to enjoy dehydrated kale.
Dehydrated spinach

Spinach

Fast-spoiling fresh, effortless dried. No need to remove stems; blanch briefly if you’ll eat it uncooked.

Blanch
Optional
Drying
4–6 h
Temp
55 °C
Rich in
Protein · fibre · antioxidants · vitamins & minerals
Ways to use & full guide →

Ways to use

  • Create your own greens powder and add to smoothies, shakes and baked goods or various breakfast dishes.
  • Grind into a powder or crush to make flakes and sprinkle over breakfast dishes, eggs, pasta, rice and vegetable dishes or salads for added texture and flavour.
  • Add spinach powder to soups, stews, savoury muffins, quiches, or any recipes to boost flavour.
  • Keep the dehydrated spinach leaves whole and add to pasta, lasagne, casseroles, soups and stews, where they will rehydrate during the cooking process.
  • Make spinach chips and add various seasonings such as sea salt, garlic powder, chilli flakes, cayenne pepper, lime or olive oil.

Tip: Done when it literally crumbles in your hands. Leaves can be layered slightly to save tray space.

Dehydrating spinach leaves is much like dehydrating kale — it’s super easy and doesn’t require blanching prior to dehydration. Wash the leaves thoroughly before dehydrating and remove excess water either with a paper towel or a salad spinner, but there’s no need to remove the stems of the leaves beforehand (unless you’re dehydrating big bunches of spinach, then follow the same steps as kale). If the stems are not fully dry, keep dehydrating for a little longer, but you will know when your spinach is done as it should literally crumble in your hands.

Because fresh spinach can turn bad relatively quickly, tossing out unused, slimy spinach leaves in your organic bin can often seem like a regular occurrence! Dehydrating spinach instead is a great way to preserve the leaves and get the most out of your bags of fresh spinach, preventing wastage of nutritious produce and your money too. When choosing spinach leaves for dehydration, pick fresh leaves that are nice and green, removing any damaged, wilted or brown spotted leaves beforehand. When arranging your spinach leaves on the dehydrator trays, they can be layered to save space but ensure they’re spread out evenly.

Dehydrated spinach offers multiple benefits being that it’s a great source of protein, fibre and antioxidants, plus various vitamins and minerals. Some of these health benefits include boosting immunity, promoting good heart and blood health, supporting digestion, improving brain function, and increasing energy, strength and endurance.

Like kale, dehydrated spinach makes a great addition to a greens powder and can boost the nutrients of various recipes. Check out some of our favourite ways to use dehydrated spinach.

Dehydrated cabbage

Cabbage

Red, green, savoy or Chinese — quick to prep, fast to dry and endlessly useful.

Blanch
Optional
Drying
8–12 h
Temp
55 °C
Rich in
Vitamins C, K · antioxidants
Ways to use & full guide →

Ways to use

  • Toss it in a stir fry or add to casseroles, soups and stews.
  • Make a veggie smoothie.
  • Grind into a powder and sprinkle over various dishes or salads.
  • Create cabbage chips and season with salt, pepper, chilli or wasabi powder.
  • Use in coleslaw either as is or rehydrated.
  • Add to scrambled eggs.
  • Use as topping on tacos for added crunch and flavour.

Tip: Cut into strips about 0.5 cm wide. Done when it crumbles in your hands.

Cabbage is not the first veggie you think of when it comes to dehydration, but besides fermenting, dehydrating cabbage is a great way to preserve this leafy green and prevent wastage. Whether you prefer red, green, savoy, Chinese, or a combination of several variations, dehydrating cabbage is super easy, requires minimal preparation, is fast to dry and can be used in a variety of ways.

Like its leafy green siblings, cabbage doesn’t need to be blanched prior to dehydration. To prepare, cut it into quarters, remove the core centre and wash well, using a salad spinner to remove any excess water. Cabbage can be cut into strips approximately half a centimetre wide, and if you’re planning on storing it for future use, you may want to cut any longer pieces in half so they fit in jars or containers easier. Spread the cabbage evenly on your dehydrator trays, and if necessary for space, you can layer them slightly. You will know your cabbage is done when it crumbles in your hands.

Rich in vitamins C and K [2], dehydrated cabbage is packed with vitamins, minerals and antioxidants and provides impressive health benefits. Dehydrated cabbage helps to improve digestion and supports heart and blood health.

Whilst many people would easily throw away fresh, unused cabbage, there are many ways to use it once it’s dehydrated. See our suggestions below.

Read the full greens introduction →

We all know how nutritious leafy greens are and how important they are to include in our diets. Besides being packed with a heap of nutrients that boost immunity, leafy greens can also increase energy and improve your overall mood and well-being. Dehydrating greens to create your very own powdered greens supplement is super easy to do and a great alternative to buying one of the many supplements found on the shelves of health food stores. Not only will it save you money, but you also control what goes in: no additives and no added vitamins or minerals in high doses. Like all vegetables, greens can contain small amounts of cadmium and lead: the Food Standards Code sets limits for both in vegetables sold in New Zealand, and drying concentrates them by weight, so vary your greens and where you buy them [3] (check out our Dehydrated Powders page for further info on vegetable powders).

Instead of turning your dehydrated greens into a powder, you can also create various healthy snacks, use them for added crunch and texture in salads and savoury dishes, or even dehydrate to preserve your produce and use in soups, stews and hot meals.

Whilst it may be necessary to blanch certain vegetables to help maintain the colour, texture and nutrient content, when it comes to dehydrating greens, it’s not absolutely necessary. The general rule of thumb is that if you would eat the vegetable raw, then it’s often not required to blanch first, although some might still require a short blanching time to preserve the colour and general appearance of the veggie (more on this later). Drying doesn’t kill bacteria, though: leafy greens can carry illness-causing bacteria [4], and FSANZ notes that Salmonella can survive for months or even years in low-moisture foods [5]. If you’ll eat your greens without cooking them (chips, toppings or smoothie powders), blanch them in boiling water for 1–2 minutes first: US home-preservation guidance blanches greens before drying, and says blanching helps destroy harmful bacteria during drying [6][1].

So, what are our favourite greens to dehydrate? Check out our list below.

Dehydrated root vegetables

Fibrous and dense, so blanch most root veg first — it keeps colour and texture, helps clean the surface and reduces germs on it. Then cut evenly and dry until hard or leathery.

Blanching times

  • Potatoes: 5 min
  • Kūmara: 7 min
  • Carrots: 4 min
  • Beetroot: Cook whole until tender
  • Onions: Optional, 30 s – 1 min
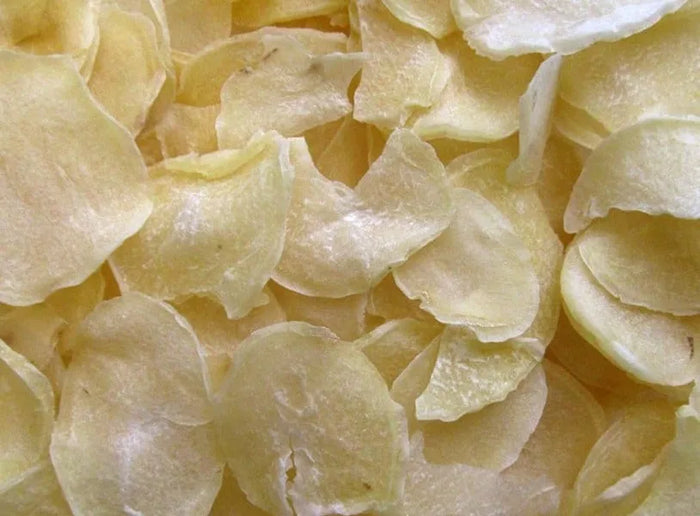
Dehydrated potatoes

Potatoes

Chips, flakes, hash browns or a gravy thickener. Soak in acidulated water to stop browning.

Blanch
5 min
Drying
6–8 h
Temp
55 °C
Rich in
Antioxidants · fibre · potassium · vitamins C & B6
Ways to use & full guide →

Ways to use

  • Add to stews, soups, casseroles or other hot dishes.
  • Use as a thickener for gravies, sauces and soups.
  • Rehydrate with water and either roast, mash, or make hash browns.
  • Fry up in a pan to create your own chips, and add your seasoning of choice — you could use salt, garlic powder, smoked paprika or chilli powder.
  • Turn into potato flakes and sprinkle over various veggie dishes or salads to add flavour and texture.

Tip: Dehydrated potatoes are quite hard — snack on them, or store and rehydrate into meals.

Who doesn’t love to get stuck into a bag of potato chips? An easily addictive snack, you can now make your very own potato chips at home with minimal fuss and the peace of mind of knowing exactly what seasonings/process is used to create them. Full of flavour, dehydrated spuds can be used in many ways, ensuring you get the most out of this popular root veggie and preventing unnecessary food wastage.

To prepare potatoes for dehydration, we like to remove the skin, although you can choose to keep it on if the potatoes are fresh and undamaged. Use firm potatoes with no green patches or sprouts, and cut out the eyes and any green or damaged parts generously: potatoes contain natural toxins called solanines, cooking doesn’t destroy them, and MPI advises not eating potato sprouts or a potato that tastes bitter after cooking [7]. As with various types of fruit prior to dehydration, it’s a good idea that once your potatoes are peeled, you pop them in a bowl of water mixed with either ascorbic acid or citric acid/lemon juice to prevent them from turning brown. Following this process, you can then cut them into your desired size or shape, depending on how you’re going to use the potatoes once they’re dehydrated (once cut, potatoes will need to be blanched for around 5–6 minutes and then allowed to cool before placing them on your dehydrator trays). Potatoes can be diced, sliced, shredded, or even cut into french fries — the choices are endless!

Another option with potatoes is to dehydrate mashed potatoes — so boiling and mashing without any additional butter/cream etc., and then spreading the mashed potato onto a dehydrator tray. As the mashed potato dehydrates, it will break into pieces and begin to crinkle up. When the potato is completely dry, you can then place all the pieces in a food processor and grind it into a fine powder or potato flakes. If you notice any moisture once your potatoes have gone through the food processor, ensure you pop them back in the dehydrator, so they’re completely dry before storing.

Potatoes are packed with nutrients and provide many health benefits, and the dehydrated version is no different. A great source of antioxidants, fibre, potassium, and vitamins C and B6, dehydrated potatoes support good digestive health and are naturally gluten-free.

Potatoes will be quite hard once dehydrated, so if you choose not to have them as a snack, you can store them and rehydrate them in meals. See our suggestions below.

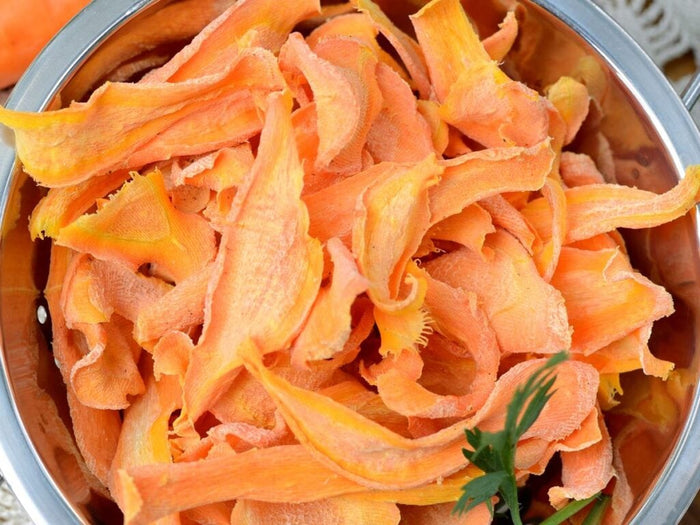
Dehydrated carrots

Carrots

Cubed, sliced, shredded or julienned. A short blanch keeps colour and extends shelf life.

Blanch
2–4 min
Drying
6–10 h
Temp
55 °C
Rich in
Vitamins A, C, K · fibre · potassium · calcium · iron
Ways to use & full guide →

Ways to use

  • Use in soups, stews, casseroles, rice dishes and stuffing.
  • Rehydrate and roast or mash to enjoy as a side dish.
  • Grind into a powder or use flakes to sprinkle over salads and various vegetable dishes for added crunch and flavour.
  • Use in baked goods such as cakes, muffins or breads.
  • Add to smoothies for extra nutrients.
  • Create your own carrot chips with salt or your choice of seasoning.

Tip: Done when leathery and they break easily. Still bendy? Keep drying.

Carrots are not just for Bugs Bunny! Rich in nutrients, this orange veggie can be dehydrated and used in a variety of ways that will help preserve and prevent the wastage of your fresh produce.

Although it can be debated whether you need to blanch carrots prior to dehydration, we recommend taking that extra step to help preserve the colour, texture and flavour of your carrots. This will also shorten the dehydration time slightly and extend the shelf life too.

To prepare carrots for dehydration, wash and peel them first, especially if they’ve been grown in your garden. You can choose to cut them however you wish, depending on how you want to use them once dehydrated (baby carrots you can keep whole, but they will take longer to dehydrate) — you may want to cube or dice them, slice or shred, or even cut them julienne to create your own dehydrated carrot fries! The next step is to blanch your carrots, and the timing will vary slightly depending on how the carrots have been cut. The thinner they are, the less time they need in boiling water, so for shredded or thinly cut julienne, blanch for around 2 minutes and cubes or thicker slices for closer to 4 minutes.

Spread the carrots out evenly on your dehydrator trays and allow them to dry until their surface has a leathery texture and they break easily. If they’re still quite bendy, or you sense any moisture, leave them to dehydrate for a little longer to ensure they don’t spoil when stored.

Dehydrated carrots provide a heap of nutritional benefits and can be used in a variety of ways. Rich in vitamins, minerals and antioxidants, dehydrated carrots are high in vitamins A, C and K and high in fibre, potassium, calcium and iron. Dehydrated carrots enhance eye health, boost immunity, assist with digestion, strengthen bones and support heart and blood health.

Like potatoes, carrots can be rehydrated and used in many hot meals. See our suggestions for using dehydrated carrots below.

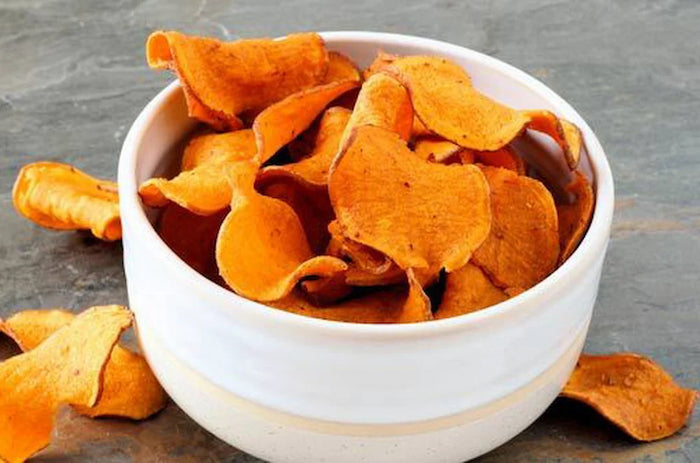
Dehydrated kūmara

Kūmara (sweet potato)

Lightweight, naturally sweet and ideal for tramping. Blanch — or bake 20 minutes for more sweetness.

Blanch
7 min
Drying
6–8 h
Temp
55 °C
Rich in
Beta carotene (orange kūmara) · B vitamins · potassium · manganese
Ways to use & full guide →

Ways to use

  • Make kūmara chips and season with your choice of sea salt, chilli salt/flakes, cayenne pepper, lime or garlic powder.
  • Add crumbled to breakfast dishes such as oatmeal, porridge, chia seed pudding or even eggs for a touch of sweetness and texture.
  • Combine with nuts and berries to create a tramping mix.
  • Add to soups, stews, rice dishes and casseroles.
  • Sprinkle over salads or vegetable dishes for crunch and flavour.
  • Make kūmara leather and cut into pieces to enjoy as a healthy snack.
  • Rehydrate and add to various dishes or as a vegetable side.

Tip: Puree and spread thin for kūmara leather; dry longer and it breaks into crunchy pieces.

Dehydrating kūmara (sweet potato) is much the same as dehydrating potatoes — you will follow the same process of blanching prior to drying, but we always recommend peeling kūmara to remove any blemishes and dirty skin, and cutting away any damaged parts: MPI advises removing damaged parts of kūmara before cooking, and not eating kūmara that tastes bitter after cooking [7]. Dehydrated kūmara provide a healthy and satisfying snack given their slightly sweet flavour and are great for those going on long tramps or camping, being that they’re lightweight, packed with nutrients and can be rehydrated easily.

As with other root vegetables, blanching kūmara before dehydrating is ideal and will preserve the nutrient content, however, you can also bake the kūmara for approx 20 minutes instead of blanching, which tends to retain their sweet flavour and texture even more. To prepare, simply wash, peel and cut your kūmara either in cubes, slices or julienne to create kūmara fries, or alternatively, you can shred them with the coarse side of a grater. Another option is to pre-treat your kūmara by baking and then either mashing or using a blender to puree and then spreading it onto a dehydrator tray to create a kūmara leather. Just like fruit variations, you can enjoy kūmara leather as a healthy snack as is, or you can simply rehydrate it to make mash. If you keep the kūmara leather in the dehydrator for a little longer, it will become more brittle and break apart into crunchy pieces easily, which is delicious on its own or added to various dishes.

Besides their delicious flavour, dehydrated kūmara deliver multiple nutritional benefits that support the mind and body. Orange-fleshed kūmara are a rich source of beta carotene, which converts into vitamin A in the body [2], and dehydrated kūmara are also high in B vitamins, antioxidants and minerals, including potassium, manganese and fibre. Dehydrated kūmara support skin health, boost metabolism, support blood and heart health and help increase the feeling of fullness, which in turn prevents unhealthy snacking.

See below for our favourite ways to use dehydrated kūmara.

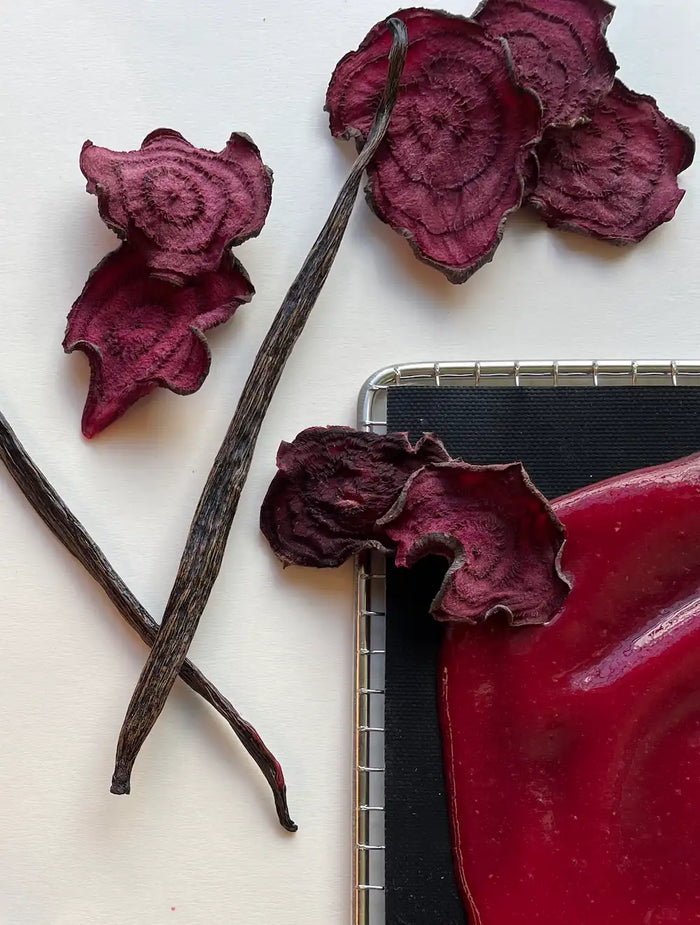
Dehydrated beetroot

Beetroot

Sweet yet savoury once dried. Parboil whole and the skins slip straight off.

Blanch
Cook whole
Drying
8–12 h
Temp
55 °C
Rich in
Folate · B vitamins · magnesium · iron · potassium
Ways to use & full guide →

Ways to use

  • Make crispy beet chips seasoned with salt, chilli salt/flakes, garlic powder or even ground rosemary.
  • Grind into a beet powder and add to smoothies, juices, soups, curries or even baked goods.
  • Crumble and sprinkle over salads or veggie dishes for added texture and flavour.
  • Store and rehydrate to use in stews, casseroles or various hot dishes.
  • Rehydrate and either roast or mash and serve with a roast or choice of meat.

Tip: Cut to an even thickness so every piece finishes together — the drier, the better.

Just like its root veggie brothers and sisters, dehydrated beets make a delicious and healthy snack (think beet chips) and can also be ground into beet powder or dehydrated for the purpose of preserving and then rehydrating to add to cooked dishes or salads.

Same process goes for preparing your raw beets for dehydration, however, cook the beets whole, leaving the skin on, until just tender (about 20 minutes for small beets), then place them in cold water and peel the skins off; they need no further blanching [1]. This not only makes it easier to remove the skin, but it will also make it easier to cut the beets prior to dehydration, whether it be in thin slices for beet chips, diced, or cut into strips. Whichever way you choose to cut your beets, ensure they’re an even thickness, so they dehydrate at the same time. With beets, much like carrots, potatoes and kūmara, the dryer they are, the better, and it will also prevent any spoilage when they’re stored.

Although you may think dehydrated beets would have a strong earthy flavour, they actually deliver a sweet yet savoury taste that makes them a favourite dehydrated vegetable amongst many. Beets are also considered a superfood, and besides their delicious flavour, they’re packed with vitamins and minerals that provide numerous health benefits too. Rich in folate [2], they’re also a good source of other B vitamins, magnesium, iron and potassium, which support heart and blood health, strengthen bones and improve brain function and memory.

Some of our favourite ways to use dehydrated beets are listed below.

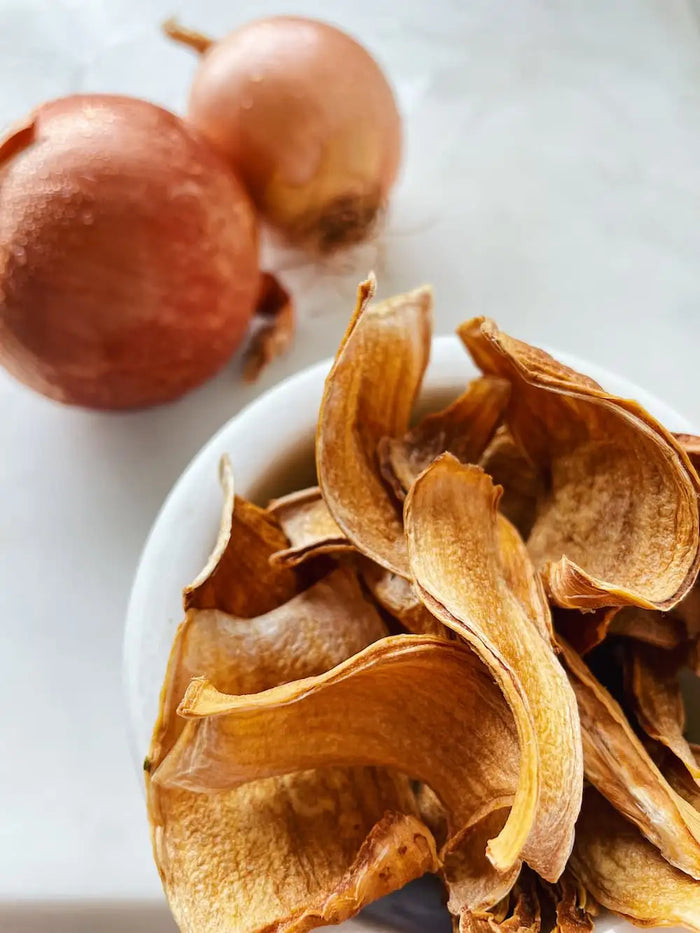
Dehydrated onions

Onions

Minced, flaked or powdered. No blanch needed; in our experience a quick one cuts the smell.

Blanch
Optional
Drying
8–12 h
Temp
55 °C
Rich in
Vitamin C · B vitamins · calcium · potassium · magnesium
Ways to use & full guide →

Ways to use

  • Create your own onion powder and use it to flavour anything from dips, soups, stews, meats, and veggies.
  • Combine with other vegetable, herb or spice powder to create a blended seasoning or custom rub mix — perfect for fish, meat or poultry.
  • Rehydrate minced onions to be used in various raw or cooked foods.

Tip: Separate the layers before loading. Done when they snap easily.

Dehydrating onions is a great way to preserve and get the most out of this veggie before they turn soft or spoil. Dehydrated onions add great flavour to various dishes and can be converted into dried minced onions or even onion flakes or powder.

One thing to note prior to dehydrating onions is that the smell is very strong and can linger in your house and on your dehydrator trays for a long time after you’re done! To avoid this, run your dehydrator in a well-ventilated room, with a window open or an extractor fan on, or in a dry, ventilated space such as a garage, always where the machine stays dry and following its instructions. To get rid of the smell from your trays post-dehydrating, we recommend washing them in warm soapy water and even rubbing them well with lemon juice — repeat if necessary!

In our experience, briefly blanching the onions prior to dehydration also helps cut down on the smell, although it isn’t necessary. Simply peel your onions and then cut them into slices or dice, and then separate the layers before laying them out on the trays. You’ll know your onions are fully dried and ready when they snap easily — if they don’t, leave them a little longer.

Dehydrated onions are rich in antioxidants that support heart and overall blood health and are a great source of vitamin C and B vitamins as well as calcium, potassium and magnesium [2]. Adding dehydrated onions to your diet can assist with gut health and digestion, support the liver and benefit skin health too.

Here are some of our favourite ways to use dehydrated onions.

Read the full root vegetables introduction →

Whilst fresh root vegetables tend to maintain their quality for a while, choosing to dehydrate them provides a great healthy snacking option and a way to preserve the flavour and nutrients of your fresh produce to use down the track. Unlike leafy greens, we recommend blanching most root veggies in preparation for dehydration. This will help to maintain the colour and texture, help clean dirt from the surface and reduce bacteria on it, and retain the nutrients.

It’s important to ensure you blanch your root vegetables for the correct amount of time — both under and over-blanching can take away the flavour and colour as well as the nutrients from the vegetable (see our tips for blanching further down this page). When choosing root vegetables to dehydrate, make sure they’re in good condition and they’re cut to the desired size prior to blanching. See our quick guide on blanching times for the below root vegetables.

Potatoes – 5 minutes.Kūmara – 7 minutes.Carrots – 4 minutes.Beets – cook whole until tender, then peel and slice.Onions – optional, 30 seconds to 1 minute.

Dehydrated root vegetables make a great healthy snack and add texture and flavour to a variety of dishes and recipes. While you can find shelves stocked with veggie chips like kūmara chips in New Zealand supermarkets, they can be expensive compared with making your own at home. These snacks may also include added flavours and seasonings that can affect their nutritional value.

By making your own dehydrated chips at home, you control exactly what goes in and what goodness comes out — plus you save money. Consider buying fresh root vegetables like carrots, beetroot, or kūmara in bulk or when they’re on sale, then dehydrating and storing them for later use. Instead of letting veggies that are past their peak go to waste, dehydrate them and rehydrate for use in soups, stews, rice dishes, or even as crunchy snacks.

Even though fresh vegetables are always best, dehydrating them keeps most of the minerals and fibre, concentrated by weight since water is removed (vitamin C is the main loss). Their shelf life is also significantly extended. While the uses for dehydrated vegetables might be less varied than the fruit section, there’s still a wide range of roots and vegetables suitable for dehydration, offering both delicious taste and health benefits for New Zealand kitchens.

Dehydrated cruciferous vegetables

Broccoli loses its crispness in 3–5 days in the fridge; cauliflower lasts about a week. Wash well, blanch briefly for colour and crunch, then dry until they snap like a chip.

At a glance

  • Prep: Rinse; brush cauliflower; cut evenly
  • Blanching: Broccoli 3–4 min · cauliflower 4–5 min · sprouts 5–6 min
  • Temperature: ≈ 55 °C
  • Done when: Crispy; breaks like a potato chip
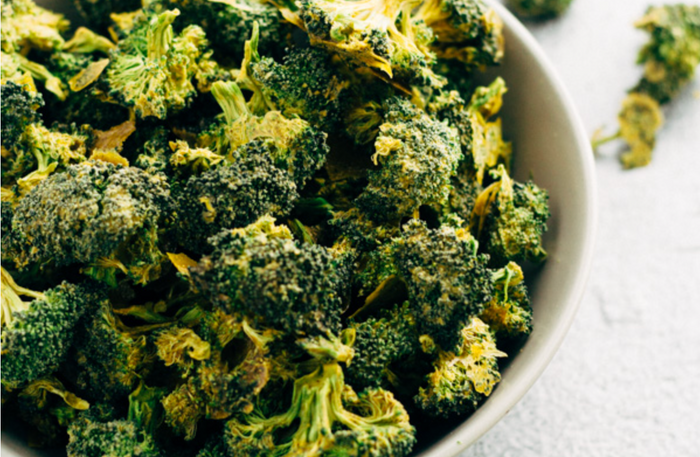
Dehydrated broccoli

Broccoli

Florets and stems both dry beautifully — just dry them on separate trays.

Blanch
3–4 min
Drying
6–8 h
Temp
55 °C
Rich in
Vitamins C, K, B · magnesium · potassium · copper · phosphorus
Ways to use & full guide →

Ways to use

  • Make broccoli chips and season with sea salt, garlic powder, chilli flakes or cayenne pepper.
  • Grind it into a powder and make your own greens powder combined with other vegetables.
  • Add broccoli powder to soups, juices or smoothies for a boost of nutrients.
  • Store and rehydrate to add to stews, casseroles, soups or serve as a vegetable side.
  • Add to salads for added crunch and texture.
  • Use in savoury baked goods like pies, muffins or slices.

Tip: Fully dry when crispy and it breaks apart like a potato chip.

When it comes to dehydrating broccoli, no part of this cruciferous veggie goes to waste, with the stems just as tasty dehydrated as the florets, and filled with just as many nutrients too. If you’re going to dehydrate all parts of your broccoli, it’s best to do the stems separately from the florets as the drying times will differ being that the stems are much thicker.

As mentioned above, we recommend washing broccoli thoroughly before cutting the florets into as even-sized pieces as possible. You can then blanch both the cut florets and the stems (blanch the stems first before cutting them into bite-sized pieces) for approximately 3–4 minutes and let them dry on paper towels before placing them on your dehydrator trays. Broccoli will be crispy and break apart like a potato chip when it is fully dehydrated.

High in fibre and low in calories, broccoli supports healthy digestion and heart health. A great source of vitamins C, K and B vitamins, broccoli also contains minerals magnesium, potassium, copper and phosphorus and is rich in antioxidants. Dehydrated broccoli can also help to boost immunity.

Check out our favourite ways to use dehydrated broccoli.

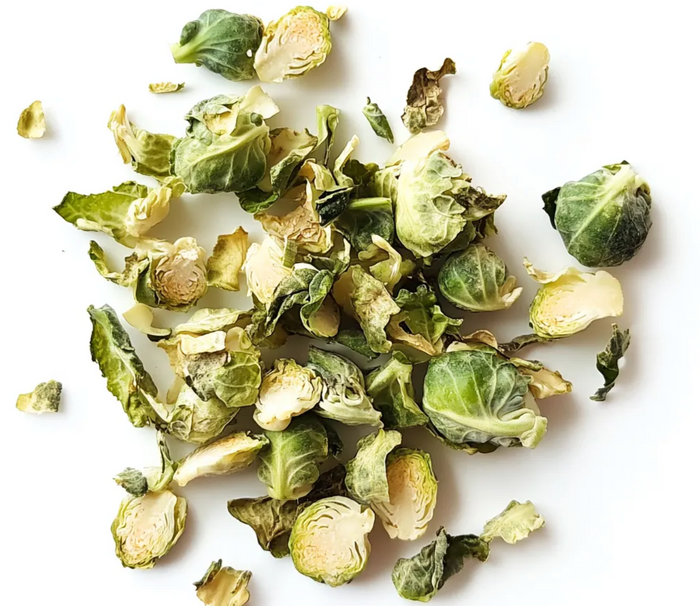
Dehydrated brussels sprouts

Brussels sprouts

The one to convert the sceptics. Slice thinly for a fast, even, crunchy dry.

Blanch
5–6 min
Drying
8–12 h
Temp
55 °C
Rich in
Vitamins C, K · protein · fibre · potassium · iron · magnesium
Ways to use & full guide →

Ways to use

  • Season with salt, pepper, garlic powder or other seasoning to create a healthy and delicious snack.
  • Put in a bowl and drizzle with olive oil, salt and chilli flakes.
  • Mix in a bowl with pumpkin seeds and add dried herbs and salt to create a crunchy and nutritious topping for salads and other veggie dishes.
  • Crumble over soups, salads, winter greens or various Asian dishes for added crunch, texture and flavour.
  • Store and rehydrate to serve as a vegetable side.

Tip: Halves take longer — check every piece is completely dry before storing.

Ok, we get it. Brussels sprouts might not be everyone’s favourite veggie, but if you haven’t tried them dehydrated, you haven’t given them a chance! A delicious, crunchy and lightweight snack, Brussels sprouts are packed with nutrients and have way fewer calories or saturated fat than store-bought chips or other processed snacks.

To prepare for dehydration, wash the Brussels sprouts thoroughly and cut them in half lengthways. Blanch for approximately 5-6 minutes if you wish (blanching isn’t absolutely necessary but will help preserve colour) and allow them to cool and dry properly on a paper towel. We recommend slicing your Brussels sprouts thinly before dehydrating them as this will allow for a faster and more even drying time — you can choose to keep them in halves, but be mindful that the dehydration process will take longer, and you will need to thoroughly check each piece is completely dry before storing.

Considered a powerful superfood, Brussels sprouts are high in vitamins C and K and a good source of protein, fibre, potassium, iron and magnesium. They boost immune function, support overall gut and digestive health, help with bone metabolism, preserve muscle mass and repair tissue, and help maintain blood health.

Still not convinced to give this one a go? Try our suggestions below, and you’ll be a fan.

Cauliflower

Prep exactly like broccoli: wash (scrub gently with a soft brush), cut into even florets, blanch 4–5 minutes, pat dry and dehydrate 6–8 hours at ≈ 55 °C.

Read the full cruciferous introduction →

It doesn’t take long for vegetables like broccoli and cauliflower to spoil — broccoli can lose its crispiness after 3-5 days in the fridge, and cauliflower can last for up to a week. Choosing to dehydrate these cruciferous vegetables not only extends the shelf life but also keeps much of the nutrition of the fresh vegetables (vitamin C is the main loss), providing a nutritious snack or healthy addition to many meals and dishes.

To prepare for dehydration, we recommend washing veggies like broccoli, cauliflower and Brussels sprouts under a running tap and even scrubbing cauliflower with a gentle brush to remove any excess dirt. We also like to blanch these veggies for a short period of time, which will help to maintain the colour and can give them more of a crunchy texture when dehydrated. See our quick guide below for blanching times.

Broccoli – 3–4 minutesCauliflower – 4–5 minutesBrussels sprouts – 5–6 minutes

You may spot broccoli and cauliflower chips in New Zealand supermarkets, health-food shops and specialty snack stores, but small packets can be pricey.

Dehydrating fresh broccoli, cauliflower, and Brussels sprouts at home not only delivers better value but also lets you customise the flavour while avoiding additives. Plus, a large homemade batch will last much longer than just a 50 g packet.

Other dehydrated vegetables

Tomatoes are technically a fruit, but they belong here with corn, chillies, beans and mushrooms — all guaranteed to amp up the flavour of everyday dishes.

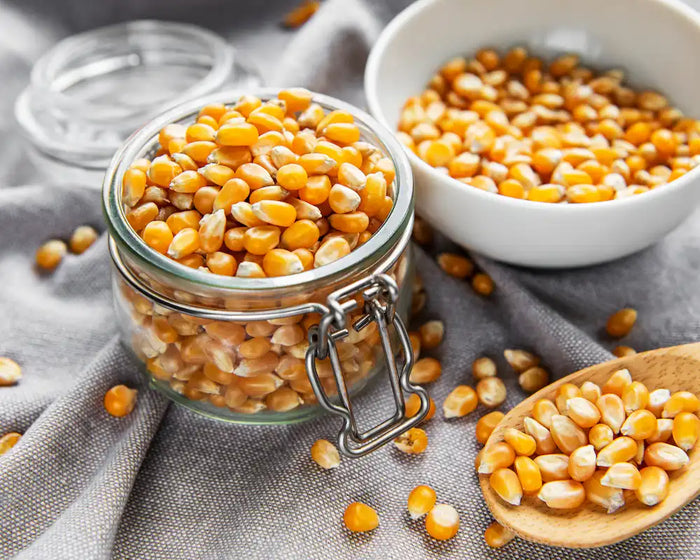
Dehydrated corn

Corn

Sweet kernels for snacking or a homemade dried soup mix. Blanch unsalted, then cut from the cob.

Blanch
4–6 min
Drying
8–12 h
Temp
55 °C
Rich in
Antioxidants · fibre · vitamin B6 · potassium · magnesium
Ways to use & full guide →

Ways to use

  • Use in salads, rice dishes, casseroles, soups and stews.
  • Enjoy on its own as a simple yet sweet snack.
  • Grind into a powder and add to hot cereals, porridge or granola.
  • Use to bake cornbread, muffins, vegetable slices or quiches.
  • Add to pancake batter.
  • Combine with other dehydrated vegetables and rehydrate to add to meals.

Tip: Done when dry, brittle and crunchy. The fresher and sweeter the cob, the better the result.

Corn is probably not one of the first vegetables you think of when it comes to dehydrating, but dehydration is a great way to preserve and store your fresh corn for future use. Dehydrated corn can be enjoyed on its own as a healthy snack and can also be mixed with other dehydrated vegetables to create your own dehydrated vegetable soup mix.

As with choosing other fresh produce to dehydrate, the quality and flavour of the corn you choose to dehydrate will be reflected in the end result. You want to use corn that is fresh and delivers a sweet flavour, which will give you sweet dehydrated kernels to enjoy in the end. To prepare your corn cobs, remove the husks and blanch in boiling water (don’t add salt) for approximately 4–6 minutes. Remove and cut the corn off the cobs carefully, running the knife down the sides of the corn. Spread your kernels evenly on the dehydrator trays and ensure they’re dry, brittle and crunchy before removing and storing.

Corn adds fibre and antioxidants, plus vitamins and minerals including vitamin B6, potassium, magnesium and phosphorus. Once dried it’s energy-dense and naturally sweet [2], so enjoy it as part of a balanced diet. Dehydrated corn supports gut health, boosts immunity, enhances eye health and keeps you feeling fuller for longer.

Check out our favourite ways to use dehydrated corn.

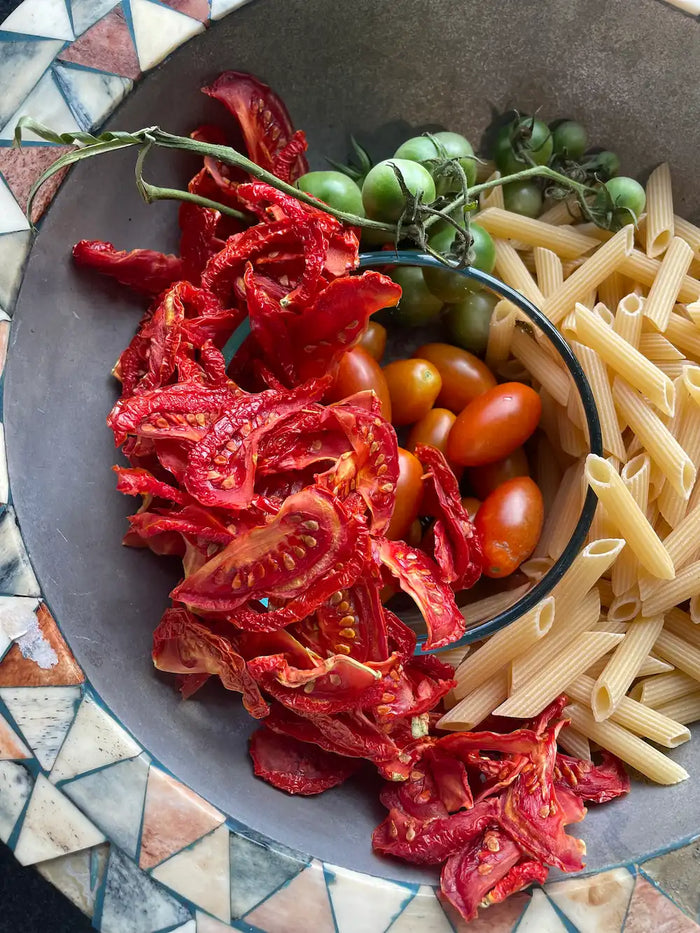
Dehydrated tomatoes

Tomatoes

Cherry, Roma or vine-ripened. Thin slices go crisp; thicker slices turn rich and leathery.

Blanch
None
Drying
8–10 h
Temp
55 °C
Rich in
Vitamin C · antioxidants
Ways to use & full guide →

Ways to use

  • Season with herbs, sea salt or chilli flakes and create crunchy and flavourful chips.
  • Use as topping on pizza or in sandwiches, burgers, focaccias etc.
  • Mix through salads, stews, pastas or casseroles for added flavour.
  • Grind and make into a tomato powder or add water to create your own tomato paste.
  • Add to quiches, omelettes and various breakfast dishes.

Tip: Slice 0.5–1.5 cm and use non-stick sheets so thin slices don’t stick.

Tomatoes are one of the easiest vegetables to dehydrate, and any type, whether it be cherry, Roma or vine-ripened tomatoes, can be used to create this deliciously sweet, yet sometimes tart, treat.

All you need to do to prepare tomatoes for dehydration is wash them well, cut out the top where the stem was, and then cut as you wish. You can choose to dice them into cubes or slice them anywhere between 0.5-1.5 cm thickness, and some tomatoes with more of a meaty flesh, like Roma/plum tomatoes, can simply be cut in half and dehydrated as is. If you’re slicing your tomatoes, the thinner the slice, the crispier the result, which is great if you’re making dehydrated tomato chips. However, if you cut them a little bit thicker, the flavour will be slightly more intense, and the texture will be more like leather than a chip. Either way, they’re both delicious!

As with other fruits and vegetables, spread your cut tomatoes evenly on your dehydrator trays to ensure the best drying results. We also recommend drying tomatoes on non-stick trays/sheets, as this will help prevent thinly sliced tomatoes from sticking during the dehydration process. If you want to add flavour to your tomato chips or tomato pieces before dehydrating, feel free to season them with salt or any herb blend you wish!

Dehydrated tomatoes are not only packed with a lot of flavour, but they’re also filled with vitamins, minerals, and antioxidants that deliver multiple health benefits. Rich in vitamin C, dehydrated tomatoes support the immune system, assist with digestive health, help strengthen bones and keep skin healthy.

Check out the many ways you can enjoy and use dehydrated tomatoes — they’re all delicious!

Dehydrated chillies

Chillies

Whole, flaked or powdered — any size or colour. Wear gloves when you prep.

Blanch
None
Drying
6–8 h
Temp
55 °C
Rich in
Vitamins & minerals
Ways to use & full guide →

Ways to use

  • Add smaller, whole dehydrated chillies to heated oil to infuse the flavour, especially in Italian pasta dishes (make it to use straight away; don’t keep chilli oil at room temperature).
  • Add whole dehydrated chillies to curries, stews and soups.
  • If you’re slow-cooking meat, add whole dehydrated chillies to intensify the flavour.
  • Chop or blend and add to various sauces, salsas or relishes for added heat.
  • Crumble and make chilli flakes which can be sprinkled or added to various dishes.
  • Grind and create your own chilli powder, which can be used as seasoning over chips and vegetables or combined with other herbs to create a meat rub.
  • Rehydrate by soaking them in warm water.

Tip: Halving reduces drying time; remove seeds to tame the heat. Done when crisp and they snap.

Dehydrated chillies are so versatile, not only in how they can be used but also in the flavour and heat they deliver. Whether you want to make a batch of dehydrated chilli flakes, create your own chilli powder, or keep your chillies whole, the options are endless and either way, dehydrated chillies are bound to spice up any dish or recipe they’re added to. Dehydration is also a great way to preserve your fresh chillies, and as a general guide, whole dried chillies keep well for up to a year if they’re dried properly and stored cool, dark and dry.

You can dehydrate any type of chilli — big or small, red, green or yellow — and the fresher they are, the better. First thing to remember when preparing chillies for dehydration is to wear gloves and avoid contact with your eyes, nose, mouth and skin in general. The heat generated from chillies can linger on the skin and is not a pleasant feeling in unwanted places.

The time for dehydration will depend on what type of chilli you’re using, but you can keep them whole or cut them in half, which will reduce the drying time slightly. It’s important to rinse the chillies well, remove the stem if you’re cutting them in halves, and if you wish to take out some of the heat, make sure to remove some of the seeds. Place the chillies evenly on your dehydrator trays, and they will be fully dry when they’re crisp and snap easily.

Besides adding flavour and intensity to any dish or recipe, dehydrated chillies also provide many health benefits. Rich in vitamins and minerals, dehydrated chillies aid in digestion, improve metabolism, boost immunity and support heart and blood health.

There are so many ways to use dehydrated chillies — see below for some of our favourites.

Dehydrated beans

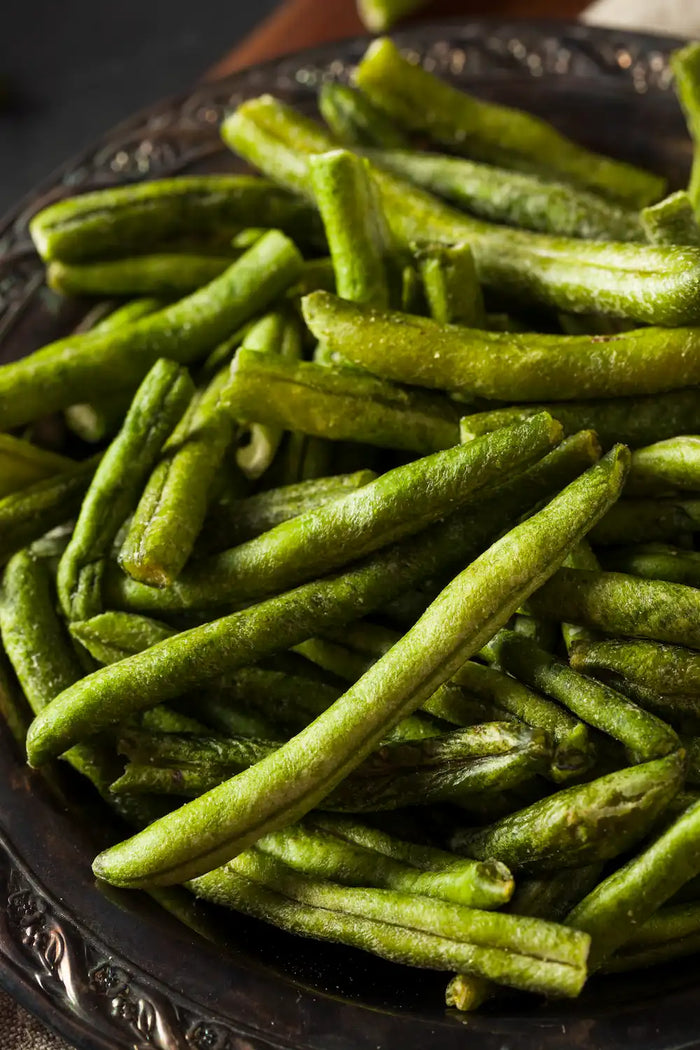
Beans

Green, black, kidney, soy or chickpeas. Tinned beans dry as-is; dried beans need soaking and boiling first.

Blanch
4 min (green)
Drying
6–8 h
Temp
55 °C
Rich in
Protein · potassium · magnesium · folate · iron · zinc
Ways to use & full guide →

Ways to use

  • Enjoy as a healthy snack on their own or add a seasoning of choice (tinned or fully cooked beans only).
  • Add to soups, stews, casseroles or any vegetable dish.
  • Grind in a processor and use it to make various dips.
  • Add to salads for extra crunch and flavour.
  • Rehydrate and include in various cuisines like Indian, Mexican/Latin American and Mediterranean.

Tip: Tinned beans split as they dry — which helps them rehydrate faster later.

No bean is off-limits when it comes to dehydrating. Green, black, red, white, soy, kidney or chickpeas — the options are endless, and they all make for a lightweight, healthy snack that are full of nutritional benefits. You can choose to dehydrate canned beans or fresh beans, but there is a slight variation in preparation for each.

With canned beans, simply drain and rinse the beans, then arrange them on your non-stick dehydrator trays evenly, so they dehydrate well. Canned beans will likely split open during the dehydration process, but this will help them rehydrate quickly if you’re storing and using them for this purpose.

If you’re using dried beans, you will likely get a better-looking finished product, with fewer beans splitting during dehydration, however, you do need to soak and cook them properly first. MPI’s advice for kidney beans, which have the highest levels of these natural toxins (lectins), is to soak them for 5 hours or longer, then boil them briskly for at least 10 minutes, and not to cook them at a low temperature such as in a slow cooker [7]; we suggest the same for other dried beans. A dehydrator runs far cooler than a rolling boil, so it can’t do that job. Once your beans are cooked, rinse well until the water runs clear and then allow them to dry fully before placing them on your dehydrator trays or non-stick sheets. Fresh green beans blanched for drying aren’t fully cooked: Ireland’s food safety authority advises boiling fresh beans for 10 minutes before eating them [8], so cook them for 10 minutes before drying if you want to snack on them.

Dehydrated beans offer a rich source of protein along with many other nutrients, making them a great choice for those following a vegan-friendly diet. Packed with antioxidants and minerals, including potassium, magnesium, folate, iron and zinc, dehydrated beans support blood and heart health, boost energy and immunity and improve digestion.

There are so many ways to use dehydrated beans, see our suggestions below.

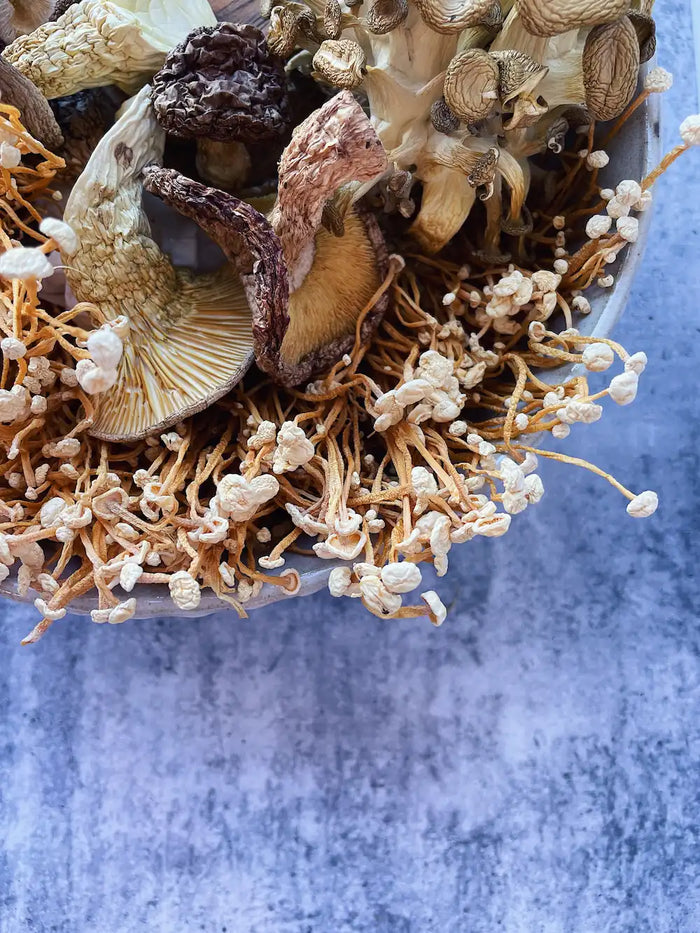
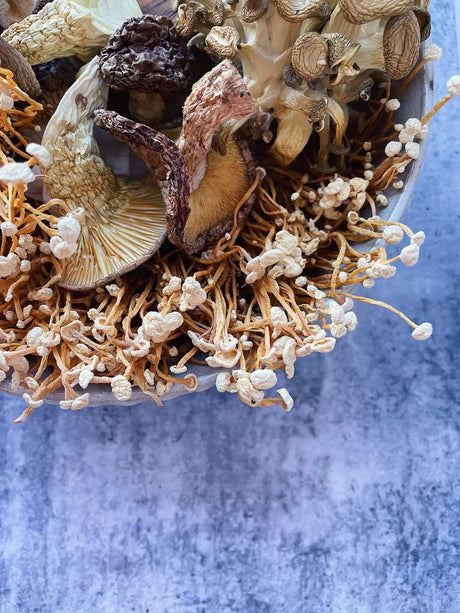
Dehydrated mushrooms

Mushrooms

Brush or rinse, slice evenly, dry. Mushroom powder becomes a pantry essential.

Blanch
None
Drying
6–8 h
Temp
55 °C
Rich in
Fibre · protein · antioxidants · vitamin D if UV-grown
Ways to use & full guide →

Ways to use

  • Make mushroom powder and use to season meat or vegetable dishes, soups, pasta sauces, casseroles and stews.
  • Combine with other herbs or vegetable powders to create your own blended seasoning.
  • Store and rehydrate and add to curries, stews, baked goods, savoury muffins, quiches, omelettes, risotto etc.
  • Make sauces and gravies.
  • Use as topping on pizzas, in burgers etc.

Tip: Done when leathery and they break apart easily. Line trays for small pieces.

We all know that it doesn’t take long for fresh mushrooms to go brown and be past their prime, but dehydrating them not only prolongs their shelf life, it’s also a great way to make a vegetable seasoning that will no doubt become a new pantry essential in your kitchen. Mushroom powder is packed with flavour that you can use to season many dishes and snacks — you’ll wonder how you got by without it! Any type of shop-bought mushroom can be used for dehydrating (New Zealand’s National Poisons Centre advises against eating wild or unknown mushrooms [9]; see food safety), but remember the more flavour the fresh mushroom has, the more flavour you’ll get in your dehydrated mushrooms/powder.

To prepare your mushrooms for dehydration, it’s important to clean them first, either by rinsing or brushing/wiping the dirt off with a damp cloth. Mushrooms don’t tend to absorb too much water when they’re cleaned, so this shouldn’t affect the dehydration process, it just may make the end result a little darker in colour than usual.

After cleaning your mushrooms, slice them at an even thickness and place them on your dehydrator trays. If you’re planning on making a mushroom powder, you can cut your mushrooms into smaller pieces rather than slices, which will speed up the dehydration process too, and it’s recommended to line your trays with baking paper so the pieces don’t fall through when dehydrated. If you’re using mushrooms with larger, thicker stems, you can cut these off and dehydrate them separately if you wish (these are good to use for mushroom powder). You’ll know your mushrooms are ready when they’re leathery in texture and break apart easily.

Dehydrated mushrooms are packed with antioxidants and essential vitamins and minerals that deliver numerous health benefits. A good source of fibre and protein, dehydrated mushrooms support the immune system, boost energy, promote good digestive health and strengthen bones and teeth. Mushrooms grown or dried in sunlight or under UV light also contain vitamin D; ordinary shop mushrooms contain little [2].

See our favourite ways to use dehydrated mushrooms below.

The sky’s the limit — more to try

Whilst we may have listed our favourite vegetables for dehydration here, the sky’s the limit when it comes to which vegetables you can dehydrate and how you can use their flavour and nutritional benefits to create delicious meals or snacks in your daily diet. Here are some of our other suggestions for vegetables you might like to consider dehydrating.

  • Leek
  • Pumpkin
  • Radish
  • Fennel
  • Cucumber
  • Asparagus
  • Artichoke
  • Courgette (zucchini)
  • Eggplant
  • Capsicum
  • Silverbeet
Read the full introduction →

So we’ve looked at leafy greens, root vegetables and a few cruciferous veggie varieties, but what about some other delicious vegetables that are prime candidates for dehydrating? Sure, tomatoes are technically considered a fruit, but we’ve added them in here along with a few of our other favourites that, when dehydrated, are guaranteed to amp up the flavour and nutritional value of various recipes and dishes. See some of our favourites below.

Choosing a machine

Which dehydrator do you need for vegetables?

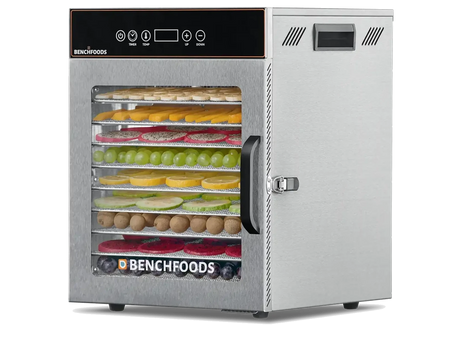
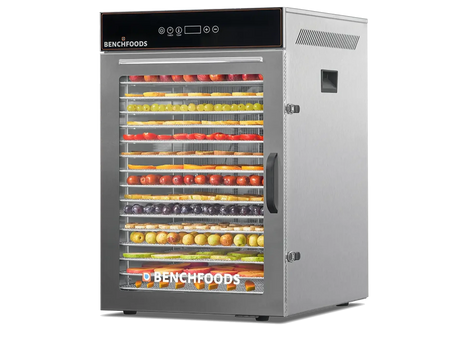
Vegetables dry best at a steady 55 °C with even airflow so every slice finishes together. Every BenchFoods unit gives consistent results tray to tray, in 304 food-grade stainless steel.

Talk to a specialist →
1 Zone / 10 Tray / 0.6 m²

Home kitchens

1 Zone / 10 Tray / 0.6 m²

Garden gluts, kale chips and soup mixes for the household pantry, in a few batches.

$429$659

View machine
1 Zone / 16 Tray / 2.56 m²

Cafés & kitchens

1 Zone / 16 Tray / 2.56 m²

Bulk greens, root veg and powders with even airflow across every tray — consistent batches for menus and meal prep.

$1,395$1,995

View machine
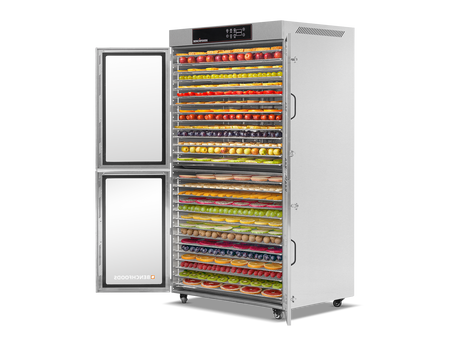
2 Zone / 28 Tray

Farms & producers

2 Zone / 28 Tray

Two independent zones: onions in one, the rest of the batch in the other.

$8,599$14,299

View machine

Which vegetable type are you drying?

Every type dries at around the same temperature — what changes is prep, blanching and how you judge “done”.

Each vegetable type: prep, blanching, temperature, drying time and done test
TypePrepBlanchTempTimeDone when
GreensWash; remove excess water; de-stem kaleOptional (1–2 min)≈ 55 °C4–12 hCrumbles in your hands
Root vegetablesPeel; cut evenly; anti-browning soak for potato30 s – 7 min≈ 55 °C6–12 hHard, or leathery and snaps
CruciferousRinse; brush; cut even florets3–6 min≈ 55 °C6–12 hCrispy; breaks like a chip
Other vegetablesVaries — see each vegetable0–6 min≈ 55 °C6–12 hBrittle, crisp or leathery

How to dehydrate vegetables

Blanching (parboiling) stops the enzymes that dull colour and flavour, helps clean the surface and reduces germs on it [1], and shortens drying time. It doesn’t make vegetables germ-free. It’s our recommended pre-treatment: quicker than steaming, and it heats evenly.

  1. Choose and clean

    Pick produce in its prime and remove anything damaged, wilted, mouldy or spotted. Wash well under running water, rubbing the surface, then dry; brush cauliflower and wipe mushrooms with a damp cloth. Washing reduces germs but doesn’t remove them all.

    • In-season produce
    • No blemishes
  2. Cut to an even size

    Slice, dice, shred or julienne to a consistent thickness so every piece dries at the same rate. Dry thick stems separately from leaves and florets.

    • Even thickness
    • Stems separate
  3. Bring water to a boil and prep an ice bath

    Fill a big pot with enough water to cover your vegetables and bring it to a boil. Fill a large bowl or sink with cold water and ice.

    • Rolling boil
    • Ice water ready
  4. Blanch in small batches

    Place a small batch in the boiling water and time it (see the guide below). Don’t over-blanch — it strips colour, flavour and nutrients.

    • Small batches
    • Time precisely
  5. Shock, drain and pat dry

    Lift the veg out with a draining spoon and plunge straight into the ice water, changing it if it warms. Drain, pat dry on a clean towel and let it dry fully before loading.

    • Ice bath
    • Fully dry before trays
  6. Dry at 55 °C, then condition

    Spread evenly on trays and dry at around 55 °C for about 4–12 hours (thick pieces take longer), monitoring progress. Cool, jar and shake daily for 5 days before long-term storage.

    • ≈ 55 °C
    • Condition 5 days
Read the full pre-treatment section →

Pre-treating vegetables prior to dehydration is important and will help to maintain the flavour and texture of the finished product. Referred to as blanching (or parboiling), not only does it help to reduce germs and clean the vegetables of dirt etc., but it will also help to brighten the colour and retain the nutritional content post dehydration. This is the method that we recommend to prepare your vegetables for dehydration, as it’s generally quicker than steaming and produces the best results.

With most vegetables, blanching is essential to ensure an efficient dehydration process and quality product, whilst with others that you may eat raw, blanching is not necessary. You want to be mindful that you don’t over-blanch your veggies as this can cause them to lose their nutrients as well as their colour, flavour etc. (think broccoli when it’s overcooked and loses its vibrant green colour).

To successfully blanch your vegetables, see our tips below.

1. Fill up a big pot with enough water to cover your vegetables and bring it to a boil.2. In a large bowl or your kitchen sink, fill it with cold water and ice.3. Once the water is at a constant boil, place a small batch of your veggies in the pot and time accordingly before removing them.4. Once you’ve removed the veggies from the pot with a serving spoon that allows for liquid drainage, quickly submerge them in the cold ice water (remember to change the water as you need to if it starts to get warm).5. When the vegetables are cool, remove them from the cold water with the same spoon (so the liquid drains), place them on a clean paper towel or kitchen towel and pat dry. Allow them to fully dry before placing them on the trays for dehydration.

As mentioned above, foods that you generally eat raw (except for root veggies like carrots etc.) don’t necessarily need to be blanched prior to dehydration, but as outlined previously with onions, blanching does help to eliminate some of the smell that develops during the process. Celery is also one that you don’t need to blanch, however doing so will help to retain the green colour post-dehydration.

Blanching time guide

Blanching time in boiling water for each vegetable before drying
VegetableBlanch
BeetrootCook whole until tender, then peel
Broccoli3–4 min
Brussels sprouts5–6 min
Carrots4 min
Cauliflower4–5 min
Corn4–6 min
Eggplant4 min
Green beans4 min
Kale, spinach, cabbage (eaten uncooked)1–2 min
Peas2–3 min
Potatoes5 min
Kūmara (sweet potato)7 min
No blanch needed

Tomatoes, chillies and mushrooms. Leafy greens can skip it if they’re going into cooked dishes; blanch them for 1–2 minutes if you’ll eat them uncooked.

Optional but helpful

Onions: in our experience, an optional 30-second to 1-minute blanch cuts the smell. Celery: blanching keeps the green colour after drying.

Don’t over-blanch

Over-blanching loses nutrients, colour and flavour — think overcooked broccoli that’s lost its vibrant green.

Vegetable drying time chart

Most vegetables dry at around 55 °C in about 4–12 hours. We found no New Zealand or FSANZ guidance that sets a dehydrator temperature for vegetables; US home-preservation guidance uses 60 °C [10]. We suggest about 55 °C for quality; drying isn’t a heat treatment that makes vegetables safe. Higher-water and more fibrous veg take longer; smaller, thinner cuts dry faster. Always monitor for the texture you want.

Drying time, temperature and blanching for each vegetable
VegetableCategoryDrying timeTempBlanchNotes
KaleGreens6–8 hours≈ 55 °COptional (1–2 min)Remove the middle stem; dry it separately.
SpinachGreens4–6 hours≈ 55 °COptional (1–2 min)Stems can stay on.
CabbageGreens8–12 hours≈ 55 °COptional (1–2 min)Strips about 0.5 cm wide.
PotatoesRoot vegetables6–8 hours≈ 55 °C5 minAnti-browning soak after peeling.
KūmaraRoot vegetables6–8 hours≈ 55 °C7 minOr bake ~20 min instead of blanching.
CarrotsRoot vegetables6–10 hours≈ 55 °C2–4 minShredded 2 min; cubes 4 min.
BeetrootRoot vegetables8–12 hours≈ 55 °CCook wholeCook whole until tender, then peel and slice.
OnionsRoot vegetables8–12 hours≈ 55 °COptional (30 s–1 min)Strong smell — ventilate well.
BroccoliCruciferous6–8 hours≈ 55 °C3–4 minFlorets and stems on separate trays.
CauliflowerCruciferous6–8 hours≈ 55 °C4–5 minScrub gently with a soft brush.
Brussels sproutsCruciferous8–12 hours≈ 55 °C5–6 minSlice thinly for faster drying.
CornOther vegetables8–12 hours≈ 55 °C4–6 minBlanch without salt.
TomatoesOther vegetables8–10 hours≈ 55 °CNoneUse non-stick sheets for thin slices.
ChilliesOther vegetables6–8 hours≈ 55 °CNoneWear gloves; halve to speed drying.
BeansOther vegetables6–8 hours≈ 55 °CGreen beans 4 minDried beans: soak 5 h or longer, then boil briskly 10 min or more. Green beans: cook 10 min before eating.
MushroomsOther vegetables6–8 hours≈ 55 °CNoneLine trays for small pieces.
Read the full drying times section →

With drying times for vegetables, it really depends on the type of vegetable you’re dehydrating and how it’s cut. Vegetables with a higher water content may take longer, as will those that are generally more fibrous, like root vegetables. The smaller or thinner you cut your vegetables, the quicker it will take to remove all of their moisture, so they’re fully dry before storing. Most vegetables are best dehydrated at a temperature of around 55 °C for somewhere between 4 and 12 hours, but we always recommend monitoring the progress of your vegetables to ensure you get the desired texture and result you’re after.

See our quick guide below for a rough estimate of drying times based on our prep/cutting suggestions above.

Greens — Kale = 6-8 hours @ approx. 55°C; Spinach = 4-6 hours @ approx. 55°C; Cabbage = 8-12 hours @ approx. 55°C

Root vegetables — Potatoes = 6-8 hours @ approx. 55°C; Kūmara = 6-8 hours @ approx. 55°C; Carrots = 6-10 hours @ approx. 55°C; Beets = 8-12 hours @ approx. 55°C; Onions = 8-12 hours @ approx. 55°C

Cruciferous vegetables — Broccoli = 6-8 hours @ approx. 55°C; Cauliflower = 6-8 hours @ approx. 55°C; Brussels sprouts = 8-12 hours @ approx. 55°C

Other vegetables — Corn = 8-12 hours @ 55°C; Tomatoes = 8-10 hours @ approx. 55°C; Chillies = 6-8 hours @ approx. 55°C; Beans = 6-8 hours @ approx. 55°C; Mushrooms = 6-8 hours @ approx. 55°C

How to store dehydrated vegetables

Conditioning balances humidity across every piece and helps prevent mould. Vegetables dried until brittle often need little [11], but it catches pieces that aren’t fully dry, so condition for about 5 days, then store airtight, cool and dark.

Conditioning, step by step

  1. Check all of your vegetable pieces after dehydrating to ensure they’re all dry — if you still sense moisture, continue dehydrating.
  2. Allow all of your vegetable pieces to return to room temperature post-dehydration.
  3. Place veggies in an airtight container (jars are a good choice because you can see the veggies easily) and allow a little room so you can shake the contents of the container. You don’t want to have a huge amount of space, however, as this can produce even more moisture. Other great options for storage solutions include Mylar bags, plastic containers, clamping jars, and vacuum-sealed bags.
  4. Over the next 5 days, shake the contents of the container to check that the veggies don’t stick and can move freely. You also want to look out for any moisture beads on the container and be sure that the veggies don’t stick to the sides of the container or to each other without coming off with ease. If either of these circumstances occurs, remove them and put them back into the dehydrator for further drying.

Choosing a container

Containers for dried vegetables
ContainerVerdict
Glass jars (mason, clamping, commercial)Recommended — easy to check contents
Mylar bagsRecommended
Airtight plastic containersRecommended
Vacuum-sealed bagsRecommended
Ziplock or freezer bagsShort-term only — not ideal for long-term storage or insect-proof
Discard if

You notice any mould at all — discard all of the dehydrated vegetables. It means some pieces weren’t completely dry before conditioning.

Cool, dark place

Keep away from light and heat. Stored correctly, dried vegetables keep well for 6–12 months (about 3 months somewhere warm), according to US home-preservation guidance [1][6].

Read the full storage section →

To ensure you get the most out of your dehydrated vegetables, it’s crucial that you follow the correct steps post-dehydration and condition and store your dehydrated vegetables correctly. It’s important that when you’re preparing your vegetables for dehydration, they’re cut to a similar size/thickness, as this will make it easier for you to determine which pieces are dry and which pieces may need longer in the dehydrator. Conditioning prevents mould from developing when veggies are stored in a container by balancing the humidity levels across all of your dehydrated vegetable pieces.

If you notice any mould at all, discard all of the dehydrated vegetables. This means some of your dehydrated veggies weren’t completely dry before conditioning.

To ensure you get the most out of all your hard work, it’s important to consider what type of airtight containers are best for the storage of your dehydrated vegetables. At BenchFoods, we recommend using jars like mason jars, clamping jars or any commercial glass jars, but you can also use Mylar bags, airtight plastic containers or vacuum-sealed bags. Ziplock or freezer bags are fine for the short term, but we don’t recommend them for long-term storage: plastic bags aren’t insect-proof [6], and light and air can seep through over time.

It’s best to store your dehydrated vegetables in a cool, dark place, away from light and heat that could potentially impact the quality of the vegetables and affect their shelf life. The purpose of dehydrating vegetables is so you can get more out of your fresh produce, and if they’re dehydrated, conditioned, and stored correctly they keep well for 6–12 months [1].

Food safety: drying at home and selling

Most vegetables are easy and safe to dry, but drying doesn’t kill germs, and a few vegetables need extra care. The rules for selling are different from drying for your own kitchen. Sources for each point are listed at the end of the page.

Drying stops germs growing; it doesn’t kill them

Drying stops germs growing, but it doesn’t kill them: FSANZ notes that Salmonella can survive for months or even years in low-moisture foods [5], and MPI warns that leafy greens can carry illness-causing bacteria. Wash and dry fresh vegetables and remove any damaged areas, especially if you’ll eat them raw [4]; washing reduces germs but doesn’t remove them all.

US home-preservation guidance blanches most vegetables, greens included, before drying [6], and Colorado State University says blanching helps destroy harmful bacteria during drying [1], so blanch vegetables you’ll eat without further cooking, including greens for chips or powders (1–2 minutes). MPI says pregnancy lowers immunity [4] and advises people with low immunity to avoid foods that are hard to clean, such as some herbs and mushrooms, unless they will be cooked [12]. If you are pregnant, older or have a weakened immune system, use dried greens in heated dishes rather than raw smoothies.

Greens for babies

Leafy greens such as spinach store nitrate, which young babies can’t handle well: Germany’s risk assessment institute (BfR) says infants in their first months are at risk [13]. We found no New Zealand guidance on this, so we follow BfR’s advice: don’t add spinach or greens powder to food for babies in their first months.

Beans: always fully cooked

Many types of beans contain natural toxins called lectins, and kidney beans have the highest levels: as few as 4 or 5 raw kidney beans can cause severe stomach ache, vomiting and diarrhoea [7]. MPI advises soaking kidney beans for 5 hours or longer, then boiling them briskly for at least 10 minutes, and not cooking them at a low temperature such as in a slow cooker, as poorly cooked beans can be more toxic than raw ones; tinned beans are safe to use without further cooking [7]. We suggest the same soak and boil for other dried beans. Ireland’s food safety authority advises boiling fresh beans, such as green beans, for 10 minutes before eating them [8].

Potatoes, kūmara and courgettes: no bitter ones

All potatoes contain natural toxins called solanines, with higher levels in sprouts and bitter-tasting peel. MPI advises removing green or damaged parts before cooking, not eating potato sprouts, and not eating a potato that tastes bitter after cooking: cooking doesn’t destroy these toxins. It also advises storing potatoes in a dark, cool, dry place [7].

Kūmara can also make a natural toxin where they’re damaged, so cut damaged parts away, and don’t eat kūmara that tastes bitter after cooking, or a courgette (zucchini) that smells unpleasant or tastes bitter [7].

Mushrooms: shop-bought only

Dry mushrooms bought from a supermarket or market garden. New Zealand’s National Poisons Centre advises never eating wild or unknown mushrooms: there are many poisonous species here, even tiny amounts of some can cause serious poisoning, and only an experienced mycologist can reliably identify a mushroom [9]. Drying and cooking don’t destroy mushroom toxins (US guidance) [1]. If someone eats an unknown mushroom, call the National Poisons Centre on 0800 764 766 [9].

Dried vegetables in oil

Oil cuts off air, which suits the bacterium behind botulism. CSIRO, Australia’s national science agency, says oil does not preserve food, that capsicums, pesto and chillies in oil have caused botulism, and that vegetable and herb products in oil with no further treatment should be kept in the fridge at or below 5 °C [14]. Fruit and vegetables in oil sold in New Zealand must not have a pH above 4.6 under the Food Standards Code [15]. Don’t store dried tomatoes or chillies in oil at room temperature: make chilli or garlic oil to use straight away, and keep any vegetables in oil in the fridge and use them soon.

Drying vegetables for your own kitchen

MPI describes the Food Act 2014 as helping to make sure that food sold throughout New Zealand is safe, and says anyone who sells or provides food needs to make sure it is safe and suitable to eat [16]. We found no official New Zealand statement on how the Act treats vegetables dried at home for your own household, so we don’t describe it here. The safety advice above applies either way.

Selling dried vegetables

Under the Food Act 2014, manufacturers of dried or dehydrated fruit or vegetables come under National Programme 2, a set of food safety rules for low-risk businesses: you register with your local council or MPI, renew every 2 years, and a verifier checks that you are making safe food [17]. A business based in one council area, or selling online, registers with its local council [18]. Packaged food for retail sale needs a label with the name of the food, lot identification, the supplier’s name and address, ingredients, date marking, and any storage directions and warning statements [19], and you should be able to explain how your date mark was worked out [20].

Claims must not refer to preventing, diagnosing, curing or alleviating a disease, disorder or condition, and health claims are allowed only for foods that meet the Code’s nutrient profiling criterion and rest on a food-health relationship the Code lists or one established by a systematic review [21]. Dried vegetables sold in New Zealand must stay within the Code’s limits for lead and cadmium, worked out on the vegetables before drying [3]. Consult your local council or MPI about the requirements for your operation.

Dehydrated vegetable FAQs

The questions we’re asked most often about blanching, drying and storing vegetables.

All BenchFoods FAQs →
Do all vegetables need to be blanched before dehydrating?

No. Leafy greens like kale and spinach dry well without it if you’ll use them in cooking; blanch them for 1–2 minutes first if you’ll eat them uncooked, because drying doesn’t kill bacteria. Tomatoes, chillies and mushrooms don’t need it. Root vegetables and cruciferous veggies like broccoli and cauliflower do benefit from it, since it helps preserve colour, texture, and nutrients.

What temperature should I dehydrate vegetables at?

Around 55 °C for most vegetables, with drying times generally between 4 and 12 hours depending on the type and thickness. We found no New Zealand or FSANZ guidance that sets a dehydrator temperature for vegetables (US guidance uses 60 °C), and drying doesn’t kill bacteria, so wash produce well and blanch greens you’ll eat uncooked.

How do I know when vegetables are fully dried?

They should be dry, brittle, and break or crumble easily. Kale and cabbage should crumble in your hands, carrots should have a leathery texture and snap, and onions should snap cleanly when ready.

How long should I blanch vegetables before dehydrating?

It varies by type: potatoes 5 minutes, kūmara 7 minutes, carrots 4 minutes, beetroot cooked whole until tender, broccoli 3–4 minutes, cauliflower 4–5 minutes, Brussels sprouts 5-6 minutes, corn 4-6 minutes, onions just 30 seconds to a minute.

Why does blanching matter for root vegetables specifically?

It helps maintain colour and texture, helps clean the surface and reduces (but doesn’t remove all) bacteria on it, and helps retain nutrients. Both under and over-blanching can strip flavour, colour, and nutrients, so timing matters.

Do onions need any special handling before dehydrating?

They don’t need blanching, but in our experience a quick blanch helps cut down the strong smell. Peel, slice or dice, and separate the layers before laying them on trays — they’re ready when they snap easily.

How should dehydrated vegetables be conditioned after drying?

Let them return to room temperature, place them in an airtight container with a little room to move, and shake daily for 5 days to check for stuck pieces or moisture. If mould appears at any point, discard the whole batch.

What’s the best container for storing dehydrated vegetables?

Jars, Mylar bags, airtight plastic containers, or vacuum-sealed bags. Ziplock or freezer bags are fine for the short term, but not for long-term storage: they aren’t insect-proof, and light and air seep through over time.

Do mushrooms need to be washed before dehydrating?

A rinse or a wipe with a damp cloth is enough — they don’t absorb much water during cleaning, though it may leave the dried result slightly darker in colour.

Can I dehydrate mashed potatoes?

Yes — spread plain mashed potato (no butter or cream) onto a tray. It breaks apart and crinkles as it dries, then can be ground into powder or flakes once fully dry.

Does drying kill bacteria on vegetables?

No. Drying stops bacteria and moulds growing, but it doesn’t kill them: FSANZ notes that Salmonella can survive for months or even years in low-moisture foods [5], and leafy greens can carry illness-causing bacteria [4]. Wash produce well, and blanch or cook vegetables you’ll eat without further cooking, such as greens for chips or smoothie powders.

How long do dehydrated vegetables keep?

US home-preservation guidance gives about 6–12 months in an airtight container in a cool, dark, dry place, or about 3 months somewhere warm [1][6]. Quality fades with time, so use the oldest first, and discard the whole batch if you see any mould.

Can I dry beans for snacks?

Yes, if they’re fully cooked first. Tinned beans are already cooked. For dried kidney beans, MPI advises soaking for 5 hours or longer, then boiling briskly for at least 10 minutes, and warns that beans cooked at a low temperature, as in a slow cooker, can be more toxic than raw ones [7]; a dehydrator runs cooler still. We suggest the same for other dried beans, and Ireland’s food safety authority advises boiling fresh green beans for 10 minutes [8].

Can I store dried tomatoes or chillies in oil?

Not at room temperature. Oil does not preserve food, and vegetables in oil can allow botulism: CSIRO, Australia’s national science agency, advises keeping vegetable and herb products in oil in the fridge at or below 5 °C [14]. Make chilli oil to use straight away; fruit and vegetables in oil sold in New Zealand must meet the Food Standards Code’s pH 4.6 limit [15].

Can I dry wild mushrooms?

New Zealand’s National Poisons Centre advises never eating wild or unknown mushrooms: only an experienced mycologist can reliably identify one, so it recommends mushrooms bought from a supermarket or market garden [9]. Drying and cooking don’t destroy mushroom toxins (US guidance) [1]. If someone eats an unknown mushroom, call 0800 764 766.

What changes if I want to sell dried vegetables?

Manufacturers of dried or dehydrated vegetables come under National Programme 2 of the Food Act 2014: you register with your local council or MPI and get checked by a verifier [17]. Label packaged products under the Food Standards Code [19], make no claims about preventing or curing a disease or condition [21], and keep within the Code’s limits for lead and cadmium [3]. Talk to your local council’s food safety team or MPI before starting.

References

  1. Colorado State University Extension — Drying Vegetables (Fact Sheet 9.308) (US guidance)
  2. USDA Agricultural Research Service — National Nutrient Database for Standard Reference, Release 28 (nutrient data)
  3. Australia New Zealand Food Standards Code — Schedule 19 Maximum levels of contaminants and natural toxicants (compilation 7, 2026)
  4. New Zealand Food Safety (MPI) — Safe food preparation, cooking, and storage at home (2026)
  5. FSANZ — Imported food risk statement: Dried paprika and pepper and Salmonella spp. (2016)
  6. Clemson Cooperative Extension — Drying Vegetables (HGIC 3085) (US guidance)
  7. New Zealand Food Safety (MPI) — Natural toxins in vegetables and beans (2021)
  8. Food Safety Authority of Ireland — Precautionary advice on uncooked or raw bean consumption (Irish guidance, 2024)
  9. National Poisons Centre (University of Otago) — Poisonous mushrooms in New Zealand
  10. National Center for Home Food Preservation (University of Georgia) — Food Dehydrators (US guidance)
  11. National Center for Home Food Preservation — Packaging and Storing Dried Foods (US guidance)
  12. New Zealand Food Safety (MPI) — Food for people with low immunity (2026)
  13. BfR (German Federal Institute for Risk Assessment) — Frequently asked questions on nitrate and nitrite in food (German guidance)
  14. CSIRO (Australian Government science agency) — Preservation of vegetables and herbs in oil (2021)
  15. Australia New Zealand Food Standards Code — Standard 2.3.1 Fruit and vegetables
  16. Ministry for Primary Industries — Introduction to the Food Act 2014
  17. Ministry for Primary Industries — Steps for National Programme 2 (2025)
  18. Ministry for Primary Industries — Register a food business under the Food Act (2025)
  19. Australia New Zealand Food Standards Code — Standard 1.2.1 Requirements to have labels or otherwise provide information
  20. Ministry for Primary Industries — How to determine the shelf life of food: guidance document (2016)
  21. Australia New Zealand Food Standards Code — Standard 1.2.7 Nutrition, health and related claims

Serious about dehydrating

Every slice, dried evenly

Precise temperature control and even airflow across every tray — in stainless steel, food-grade cabinets that scale from a 10-tray home unit to a multi-zone commercial line.

Dehydrated mushrooms
▲